
Modern security professionals have more responsibilities than ever. Keeping up with the influx of information from various security products throughout an organization creates a monumental task for small teams, who often carry many internal infosec-related responsibilities. Any opportunity to save time and improve efficiency is worth the investment. Red Canary uses the Microsoft Defender for Endpoint API to validate alerts for our customers, freeing up their teams to tackle more impactful work.
At Red Canary, we retrieve alerts, correlate those alerts to raw endpoint telemetry collected from Defender for Endpoint, analyze correlated information in our 24/7 CIRT (Cyber Incident Response Team) and finally communicate confirmed threats to our customers. Your security team can take a similar technical approach by using the APIs to manage alerts and add additional context before importing them into whatever platform you’ve chosen for your environment.
Familiarizing yourself with the platform
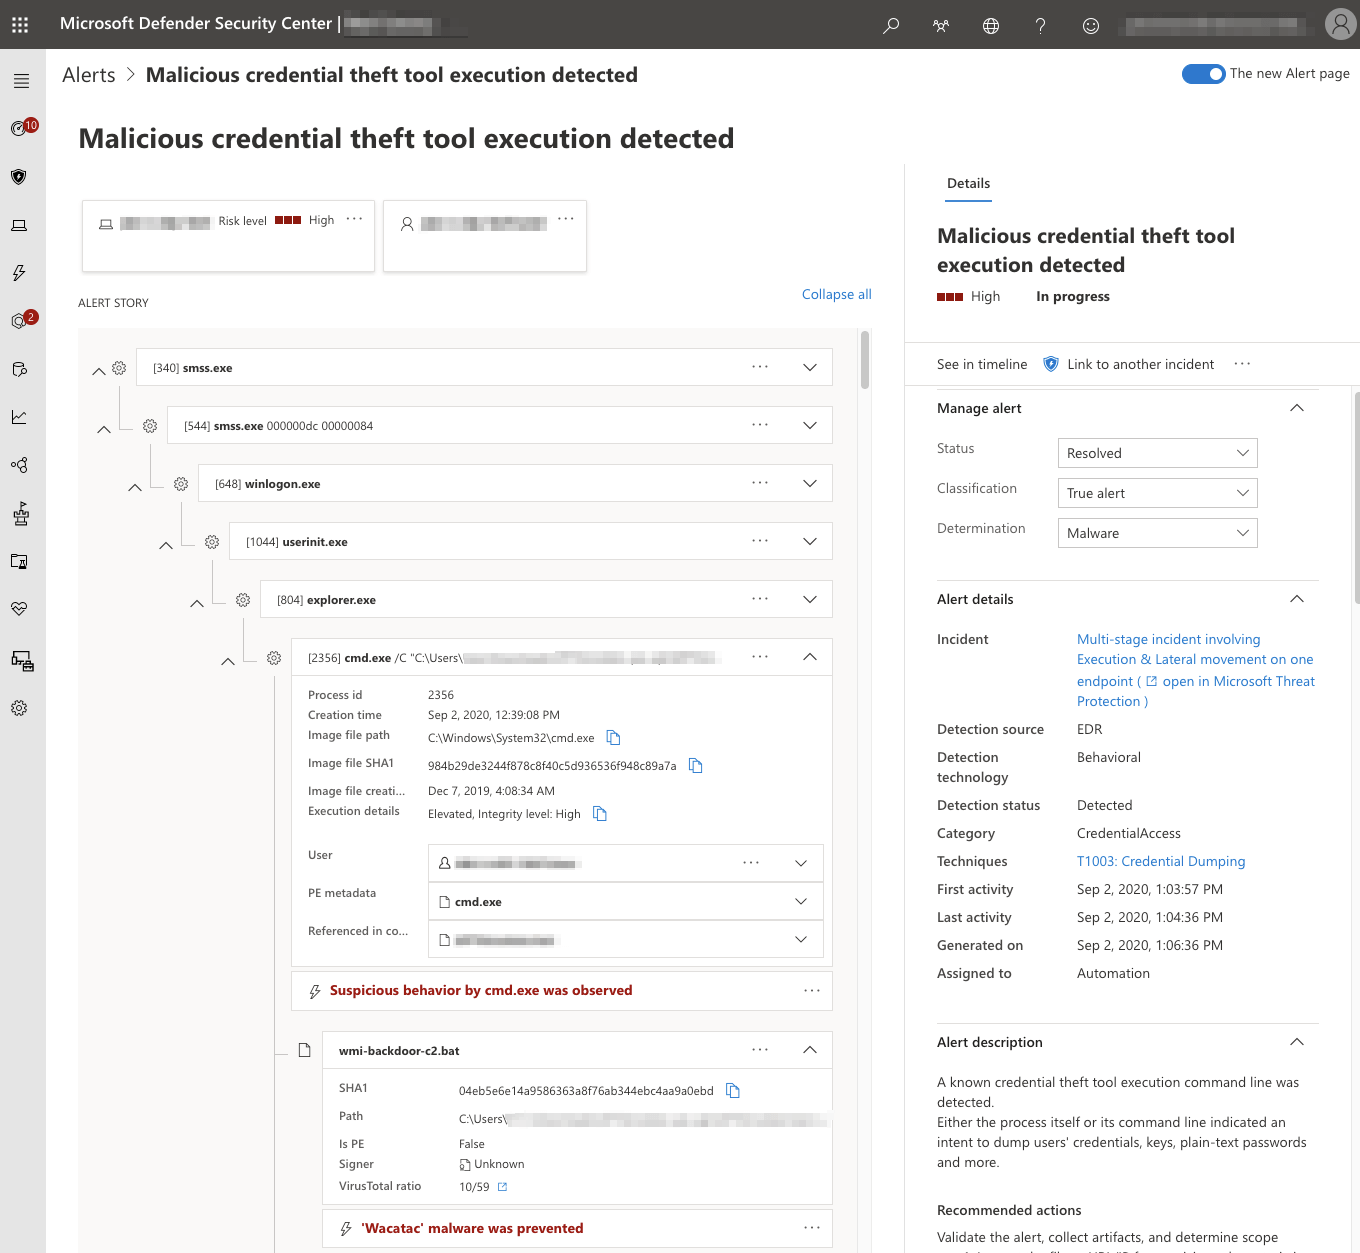
To get familiar with the data available in Defender alerts, start by reviewing them in the Microsoft Defender Security Center console. Alerts contain useful information like users, network connections, and file metadata.
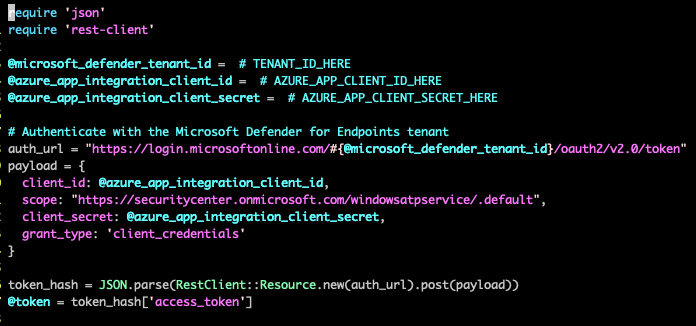
You can use the Defender APIs to periodically get the list of recent alerts along with any associated information, including users, network information, and file metadata. First, you will need to authenticate with the Microsoft Defender for Endpoint API. This can be done with a configured user or application context. Application Context is best suited for background services or daemons, whereas User Context is used to perform actions in the API on behalf of a signed-in user. For this example, we authenticate using an application context.
Microsoft Defender for Endpoint leverages OAuth 2.0 for authentication. After the authentication process, Defender for Endpoint issues an access token that your application will use to access the API.
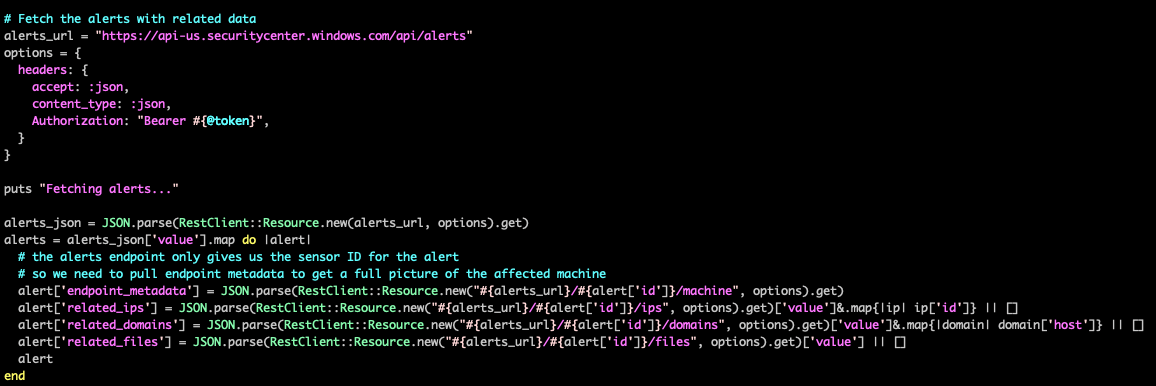
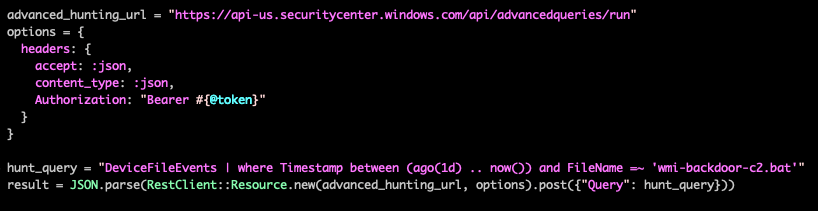
Once you have an access token, you can fetch the list of alerts from the Defender Alert API. For more examples on fetching alerts, as well as a comprehensive digest of the Defender for Endpoint API Schema, visit the Microsoft Defender for Endpoint API Schema and Fetch Alerts examples documentation page.
After getting the list of alerts, you can iterate through them to get additional information about each alert, such as endpoint metadata or related files and network information.
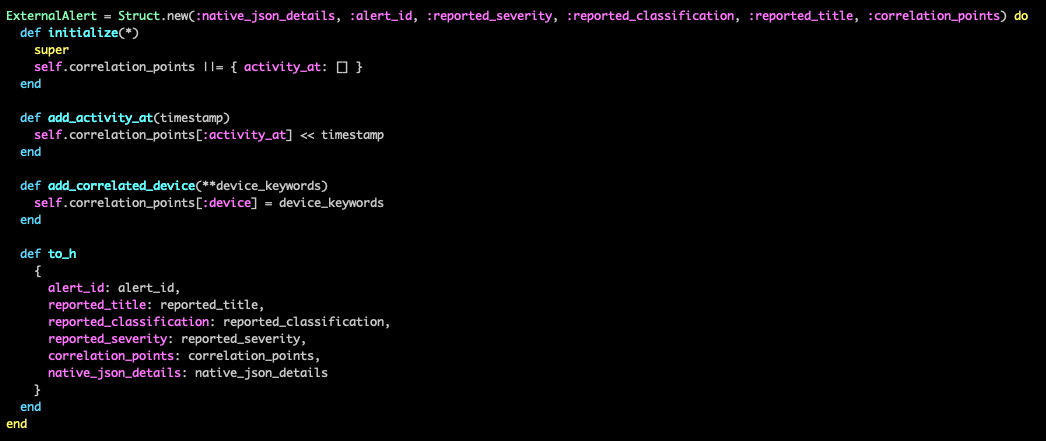
Once you have these alerts, you’ll want to parse them to extract the information that is important for correlating to your other data sources. This information can then be collected into a standardized alert model that can provide a set way of handling the information. A simple way to build such a structure is to create a struct class that contains what information you want to record from each alert:
If the alert includes identifying process information like process ID and process creation time, you can often directly correlate the alert to telemetry data without further investigation. In cases when the alert does not include process data, you can use the Advanced Hunting tools in Defender to find related telemetry. Advanced Hunting leverages a separate schema from the Defender API and queries can be run through the Defender portal, or via API. More information on Advanced Hunting, KQL, and the Advanced Hunting Schema is available on the Advanced Hunting documentation page.
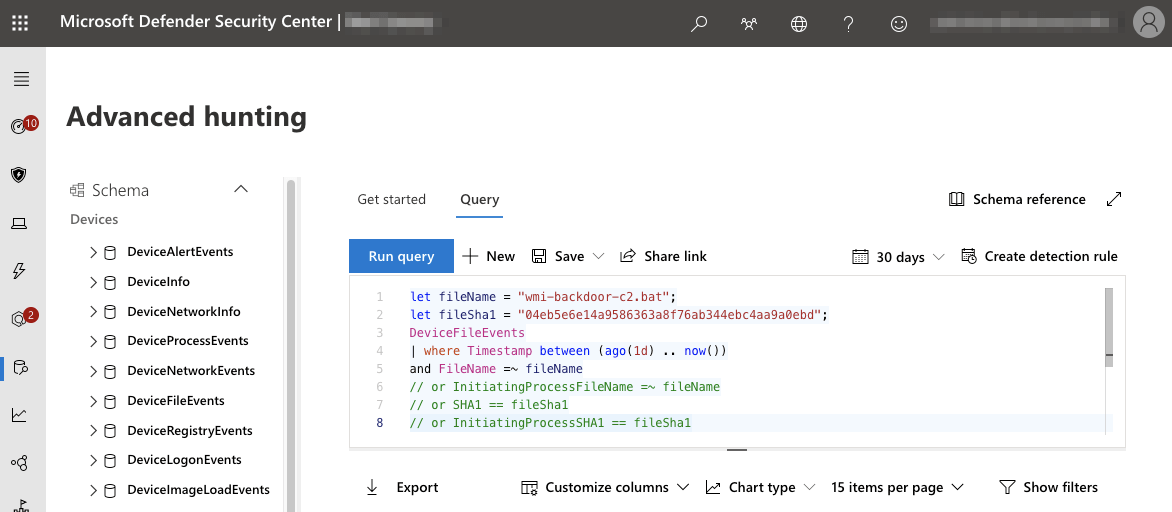
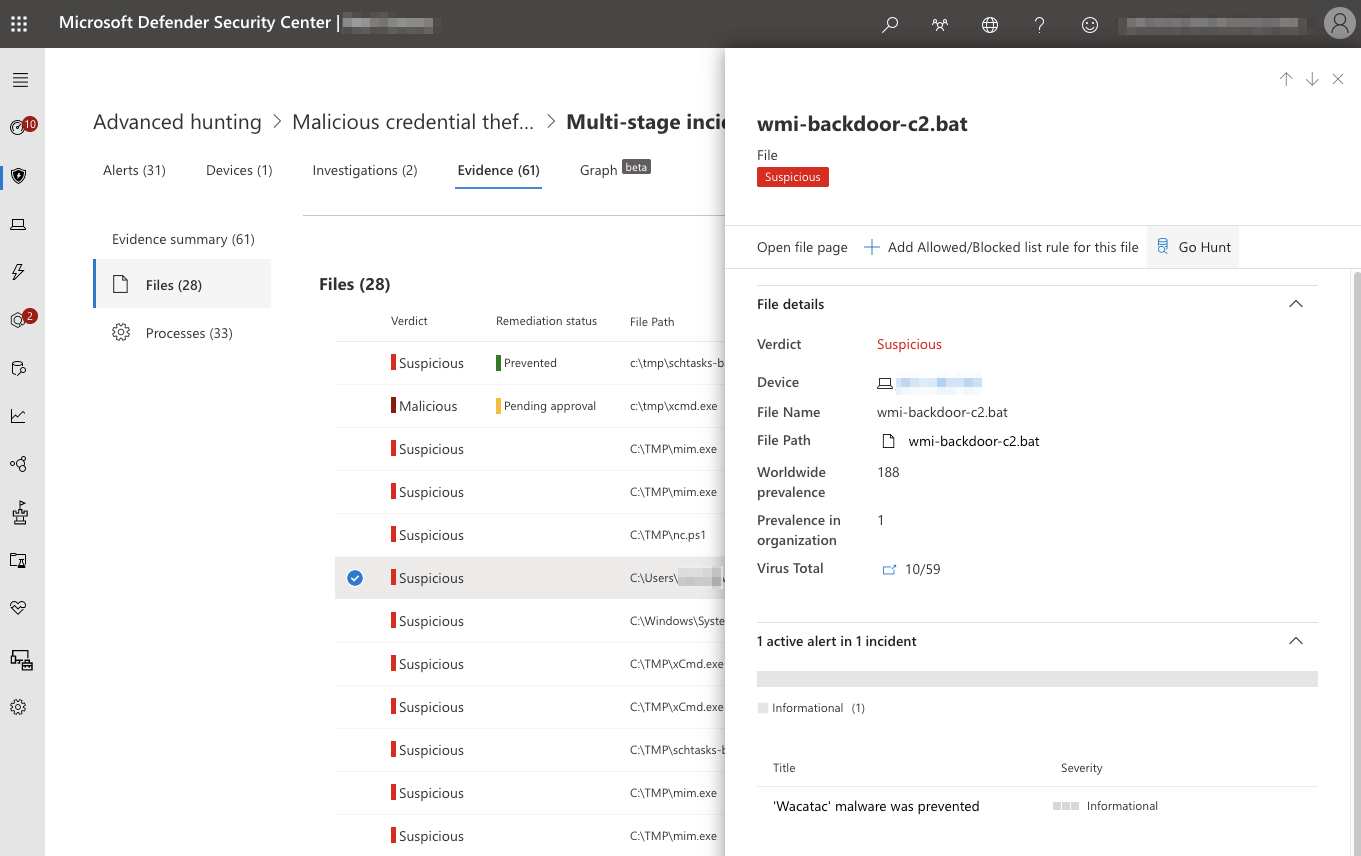
An easy way to leverage Defender for Endpoint to automatically generate an Azure Kusto query (KQL) for the relevant information is simply to pivot from an alert to the related incident and view the Evidence tab. From this view, you can select any related file or process and click Go Hunt to automatically generate and run the relevant Advanced Hunting query.
Learn more about how Red Canary analyzes alerts and detects threats using Defender for Endpoint endpoint telemetry here.
MICROSOFT SECURITY TRAILBLAZER
Related Articles
Red Canary brings MDR expertise to Microsoft Azure Cloud
Red Canary brings MDR expertise to Microsoft Azure Cloud
Red Canary teams up with Wiz as its first certified MDR partner